| Index |
|
Easy moving and resizing Stack & Tile Open and save panels Replicants |
Interfaccia grafica di Haiku
L'interfaccia grafica (GUI) di Haiku è parte integrante del sistema. Al contrario dei sistemi operativi Unix, non c'è un gestore delle finestre (window manager) separato e l'avvio in una shell testuale (linea di comando) non è possibile; ciò è semplicemente non ritenuto necessario, il focus di Haiku è l'utente desktop.
Probabilente l'utente avrà già esperienza con altri ambienti grafici, quindi salteremo i classici menu da tasto destro, drag & drop, ecc...e cercheremo invece di focalizzarci sui pochi aspetti unici della GUI di Haiku.

Alcuni aspetti nella GUI di Haiku non sono evidenti e quindi devono essere approfonditi.
La Deskbar è il menu "Start" di Haiku e la barra applicazioni. Si consiglia di leggere il capitolo Deskbar.
- Il tab giallo offre molto di più che il nome del programma o il nome del file aperto:
- E' possibile spostarlo tenendo premuto il tastoSHIFT mentre viene trascinato in un'altra posizione, consentendo di impilare un certo numero di finestre ed accedere ad esse comodamente dal nome del loro tab.
- Si può minimizzare una finestra con un doppio click sul suo tab, (o con CTRL ALT M), è possibile anche avere accesso alle finestre nascoste dalla loro voce nella Deskbar o nel Twitcher.
- Si può mandare una finestra in background con un click destro sul suo tab (o sul suo bordo).
Il pulsante di chiusura.
Il bottone "zoom" (o CTRL ALT Z). Nella maggior parte delle applicazioni, espanderà la finestra alla dimensione massima. Ma questo, tuttavia, non è obbligatorio. Le finestre del Tracker, per esempio, verranno ridimensionate per adattarsi nel miglior modo possibile al contenuto.
The window border. Left-dragging moves the window, right-dragging resizes.
The resize corner.
 A quick way to move or resize windows
Moving and resizing windows is a large part of interacting with several concurrently running applications. Instead of aiming at the small yellow title tab or the even tinier window border, there's a more convenient way to move a window. Also, additionally to its small size, the resize corner has another limitation: It only allows resizing at and in the direction of the lower right corner.
Right-dragging a border for resizing works, but again you'll have to aim carefully.
To address these issues, Haiku provides a neat solution using the window management key combo CTRL ALT and the mouse. See also chapter Shortcuts and key combinations for more shortcuts concerning window management.
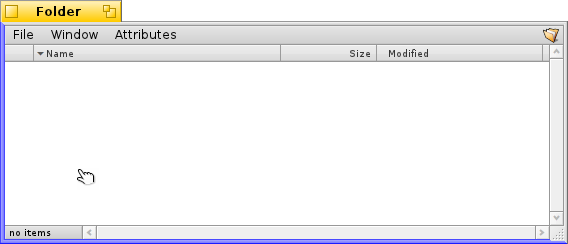
Holding down CTRL ALT will highlight the window borders nearest to the mouse pointer. Move the mouse in the direction of another border to change the target. Click and dragging with the right mouse button will resize the window along the highlighted border(s).
Hold down CTRL ALT and click and drag with the left mouse button anywhere in a window to move it around. A quick click with the right mouse button sends it to the back.
 Stack & Tile
Haiku's user interface provides a unique feature that puts the fact that windows have a yellow tab instead of a full-width title bar to perfect use. It's called "Stack & Tile".
In the example below, a Tracker window with bookmarks is tiled to the left of a WebPositive window, which itself is stacked with another Tracker window showing the source folder haiku. In this animation, the user clicks on the tabs of the stacked windows to alternately bring one or the other to the front.
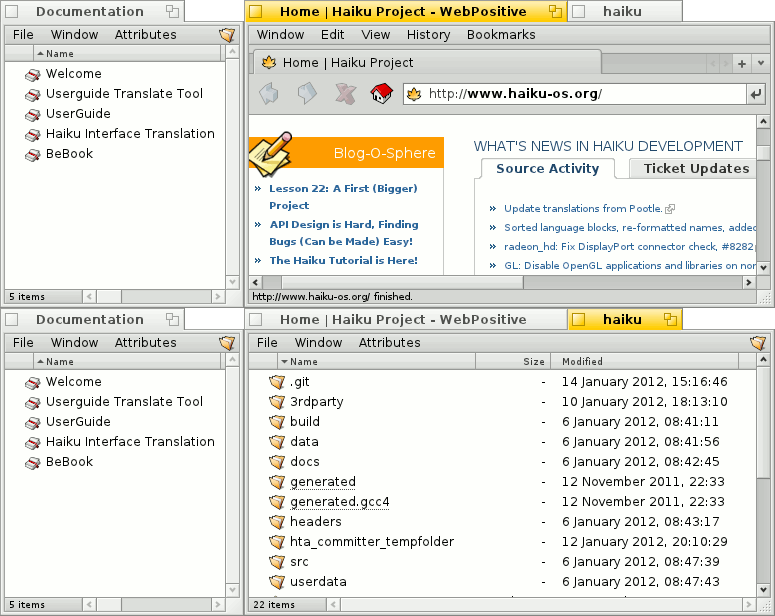
Connected like this, the group of windows can be moved and resized together - a nice arrangement to work in a more project centric environment. Instead of looking for the right browser window with documentation, editor and Tracker windows and maybe a related email concerning one project you are currently working on, just stack&tile them together.
Doing the actual arranging of windows is easy: Hold down OPT while dragging a window by its tab close to another window's tab or border until it's highlighted and release the mouse button.
Stack & Tile consists of two related parts.
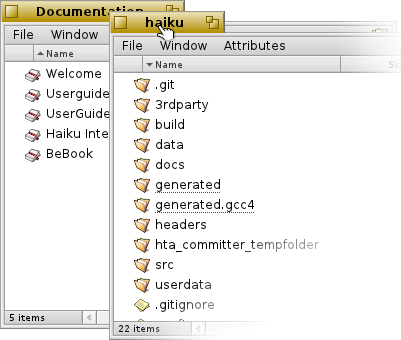 | "Stacking" is putting windows on top of each other, automatically moving the yellow tabs into position. |
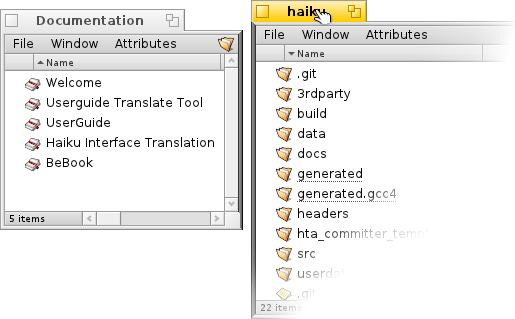 | "Tiling" means gluing windows horizontally or vertically together. |
Separation is done in the same way, by holding OPT while dragging a window by its tab out of the group.
 I pannelli apri e salva.
Quando si sta aprendo o salvando un file da un'applicazione, apparirà un pannello come questo:
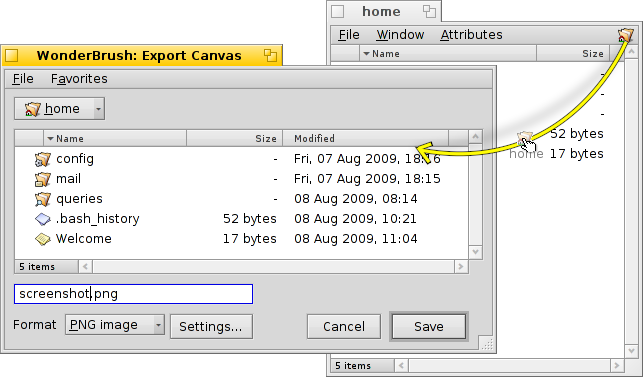
Offre tutte le caratteristiche più in uso: una lista di file da scegliere dalla cartella aperta, o in caso di un pannello di salvataggio, un campo di testo per inserire il nome del file e un pop-up menu per i differenti formati del file e le impostazioni.
E' possibile accedere alle cartelle superiori con il menu a scomparsa sopra l'elenco dei file.
Se si ha già una finestra del Tracker con il percorso per un file aperto, si può semplicemente trascinare ogni tipo file o la cartella di rappresentazione (ovvero il simbolo all'estremità destra nel menu bar) nel pannello. Questo modifica il pannello nella nuova posizione.
 Tasti di scelta rapida
Numerose scorciatoie nei pannelli per aprire e salvare sono gli stessi usati nel Tracker. Oltre ai comandi che sono disponibili attraverso il menu , ce ne sono altri non evidenti:
| ALT N | Crea una nuova cartella. | |
| ALT E | Consente di rinominare la voce selezionata. | |
| ALT ↑ | Sposta nella cartella superiore. | |
| ALT ↓ o INVIO | Sposta nella cartella selezionata, | |
| ALT D | Consente di accedere al Desktop. | |
| ALT H | Permette di accedere alla cartella Home. |
 Preferiti e cartelle recenti
Il menu (presente nei pannelli di apertura e salvataggio) fornisce una scleta fra le cartelle visitate di recente e quelle preferite, che può impostare l'utente stesso. Come indicato dalla piccola freccia, si possono usare questi percorsi per navigare, attraverso i sottomenu, più in profondità nella gerarchia.
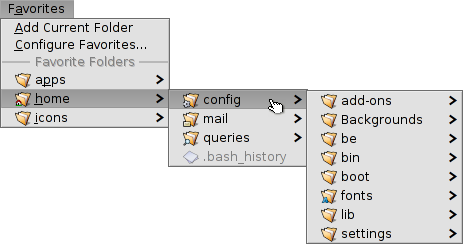
Per aggiungere un Preferito, bisogna semplicemente navigare fino alla destinazione e scegliere:
. Da ora in poi questa apparirà in ogni pannello di apertura/salvataggio.
Per rimuovere un Favorito, è sufficiente selezionare e cancellare la sua voce.
Tutti i favoriti sono conservati nella cartella /boot/home/config/settings/Tracker/Go/, quindi è possibile anche aggiungere e rimuovere direttamente i link per file e cartelle.
 I replicanti
I replicanti sono piccole parti di applicazioni che possono essere integrate in altri programmi. A patto che l'opzione della Deskbar sia stata attivata, si potrà riconoscere una parte "replicabile" di un'applicazione dalla sua piccola maniglia, normalmente nell'angolo in basso a destra:
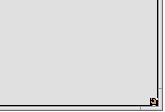
Il luogo più significante che accetta i replicanti è il Desktop: basta semplicemente trascinare la piccola maniglia su di esso.
Da ora in poi è parte del Desktop e l'applicazione principale del replicante non deve essere avviata per farlo funzionare.
Un tasto destro sull'uncino del replicante permette di visualizzare la finestra dell'applicazione principale e rimuovere il replicante.
Esempi di applicazioni replicabili sono i grafici dell'ActivityMonitor, l'applet Workspace o DeskCalc.
 Italiano
 Français
 Deutsch
 Русский
 Español
 Svenska
 日本語
日本語 Українська
 中文 [中文]
 Português
 Suomi
Suomi Slovenčina
 Magyar
 Português (Brazil)
 Català
 English