| .github | ||
| decompressor | ||
| stage1 | ||
| stage23 | ||
| test | ||
| tinf | ||
| .gitignore | ||
| bochsrc | ||
| CONFIG.md | ||
| LICENSE.md | ||
| limine-install.c | ||
| make_toolchain.sh | ||
| Makefile | ||
| PXE.md | ||
| README.md | ||
| screenshot.png | ||
| STIVALE2.md | ||
| STIVALE.md | ||
Limine
What is Limine?
Limine is an advanced x86/x86_64 BIOS Bootloader which supports modern PC features such as Long Mode, 5-level paging, and SMP (multicore), to name a few.
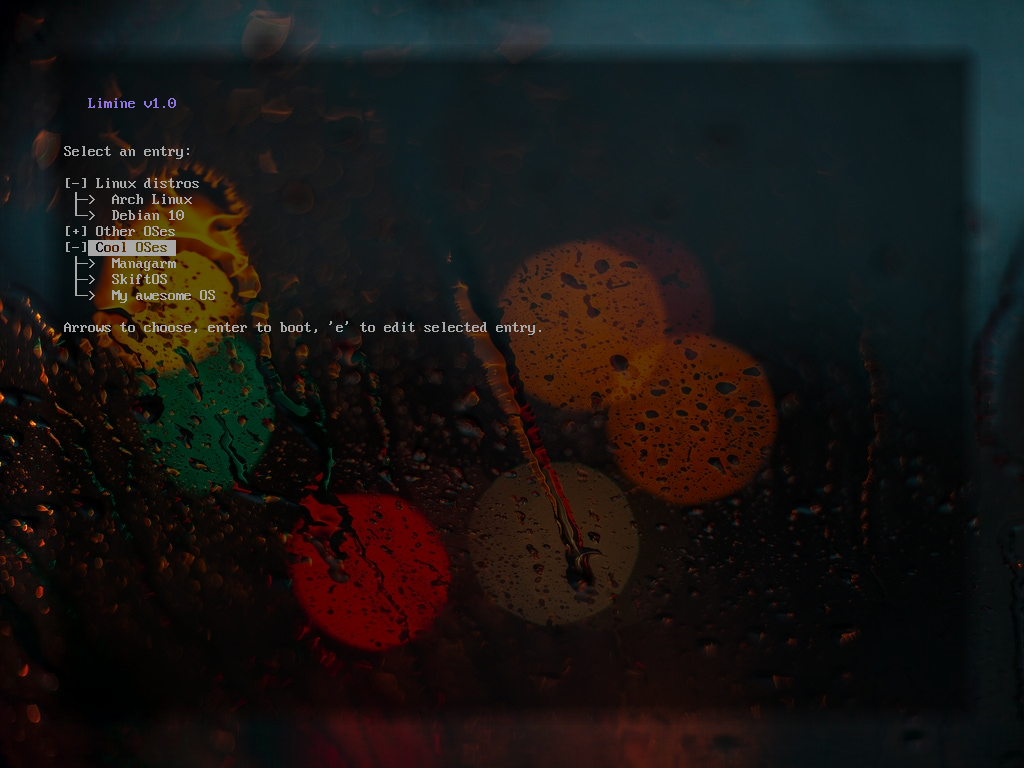
Limine's boot menu
Photo by Nishant Aneja from Pexels
Supported boot protocols
- Linux
- stivale and stivale2 (Limine's native boot protocols, see STIVALE{,2}.md for details)
- Chainloading
Supported filesystems
- ext2/3/4
- echfs
- FAT32
- ISO9660 (CDs/DVDs)
Supported partitioning schemes
- MBR
- GPT
- Unpartitioned media
Warning about using trunk
Please refrain from using the trunk branch of this repository directly, unless
you have a very good reason to.
The trunk branch is unstable, and non-backwards compatible changes are made to it
routinely.
Use instead a release, or a release branch (like v1.0-branch).
Following a release offers a fixed point, immutable snapshot of Limine, while following a release branch tracks the latest changes made to that major release's branch which do not break compatibility (but could break in other, non-obvious ways).
One can clone a release directly using
git clone https://github.com/limine-bootloader/limine.git --branch=v1.0
(replace v1.0 with the chosen release)
or a release branch with
git clone https://github.com/limine-bootloader/limine.git --branch=v1.0-branch
(replace v1.0-branch with the chosen release branch)
Also note that the documentation contained in trunk does not reflect the
documentation for the specific releases, and one should refer to the releases'
respective documentation instead, contained in their files.
Building
Building the bootloader
It is necessary to first build the set of tools that the bootloader needs in order to be built.
This can be accomplished by running:
make toolchain
The above step may take a while
After that is done, the bootloader itself can be built with:
make bootloader
The generated bootloader files are going to be in bin.
Compiling limine-install
To build the limine-install program, simply run make in the root of the repo.
This will embed the limine-hdd.bin bootloader image from the bin directory into
limine-install, ready to be deployed to a USB/hard drive (or disk image).
Then use make install to install it, optionally specifying a prefix with a
PREFIX=... option.
This will install limine-install in bin, as well as the additional binaries
needed for stage 3, CD, and PXE boot in share.
Installing is optional as it can also be used from the bin directory of the
repository just fine.
How to use
MBR
In order to install Limine on a MBR device (which can just be a raw image file),
run limine-install as such:
limine-install <path to device/image>
The boot device will need to contain the limine.sys file in either the root
or the boot directory of one of the partitions.
GPT
If using a GPT formatted device, there are 2 options one can follow for installation:
- Specifying a dedicated stage 2 partition.
- Letting
limine-installattempt to embed stage 2 within GPT structures.
In case one wants to specify a stage 2 partition, create a partition on the GPT
device of at least 32KiB in size, and pass the 1-based number of the partition
to limine-install as a second argument; such as:
limine-install <path to device/image> <1-based stage 2 partition number>
In case one wants to let limine-install embed stage 2 within GPT's structures,
simply omit the partition number, and invoke limine-install the same as one would
do for an MBR partitioned device.
The boot device will need to contain the limine.sys file in either the root
or the boot directory of one of the partitions.
CD-ROM ISO creation
In order to create a bootable ISO with Limine, place the limine-cd.bin and
limine.sys files into a directory which will serve as the root of the created ISO.
(limine.sys must either by in the root or inside a boot subdirectory;
limine-cd.bin can reside anywhere).
Place any other file you want to be on the final ISO in said directory, then run:
genisoimage -no-emul-boot -b <relative path of limine-cd.bin> \
            -boot-load-size 4 -boot-info-table -o myiso.iso <root directory>
Note: genisoimage is usually part of the cdrtools package.
<relative path of limine-cd.bin> is the relative path of limine-cd.bin inside
the root directory.
For example, if it was copied in <root directory>/boot/limine-cd.bin, it would be
boot/limine-cd.bin.
Configuration
Make sure the device/image contains at least 1 partition formatted in
a supported filesystem containing a /limine.cfg or /boot/limine.cfg file
and the kernel/modules one wants to load.
An example limine.cfg file can be found in test/limine.cfg.
More info on the format of limine.cfg can be found in CONFIG.md.
Example
For example, to create an empty image file of 64MiB in size, 1 echfs partition on the image spanning the whole device, format it, copy the relevant files over, and install Limine, one can do:
dd if=/dev/zero bs=1M count=0 seek=64 of=test.img
parted -s test.img mklabel msdos
parted -s test.img mkpart primary 1 100%
parted -s test.img set 1 boot on # Workaround for buggy BIOSes

echfs-utils -m -p0 test.img quick-format 32768
echfs-utils -m -p0 test.img import path/to/limine.cfg limine.cfg
echfs-utils -m -p0 test.img import path/to/kernel.elf kernel.elf
echfs-utils -m -p0 test.img import <path to file> <path in image>
...
limine-install test.img
One can get echfs-utils by installing https://github.com/echfs/echfs.
Acknowledgments
Limine uses a stripped-down version of tinf.
Discord server
We have a Discord server if you need support, info, or you just want to hang out with us.
